


Step 1:
Prepare the papers for your card. Start with a Bamboo card (4 1/4 x 5 1/2) and layer a piece of floral background paper over it 1/4" smaller than the card. Next, take a piece of 3 1/8 x 4 3/8 striped paper and layer it over a 3 1/4 x 4 1/2 piece of Colonial White Cardstock. Then take a piece of 1 3/4 x 1 3/4 blue textured paper from the Caboodle paper packet and layer it onto a 2 1/4 x 2 1/4 piece of Colonial White Cardstock. Use one of the square saying Stickease from the Miracle set and stick that to the middle.

Step 2:
Rub the Sweet Leaf ink pad directly a medium size A-Door-Able and stamp over it with the same ink using the flower stamp from the Intrinsic Background set. Let dry for a few minutes before touching.

Step 3:
Using Sorbet ink and a sponge, rub the ink in a circular motion over the top of the dimensional element. The white portion you see is embossed and resists the ink. (Cool, huh!?) 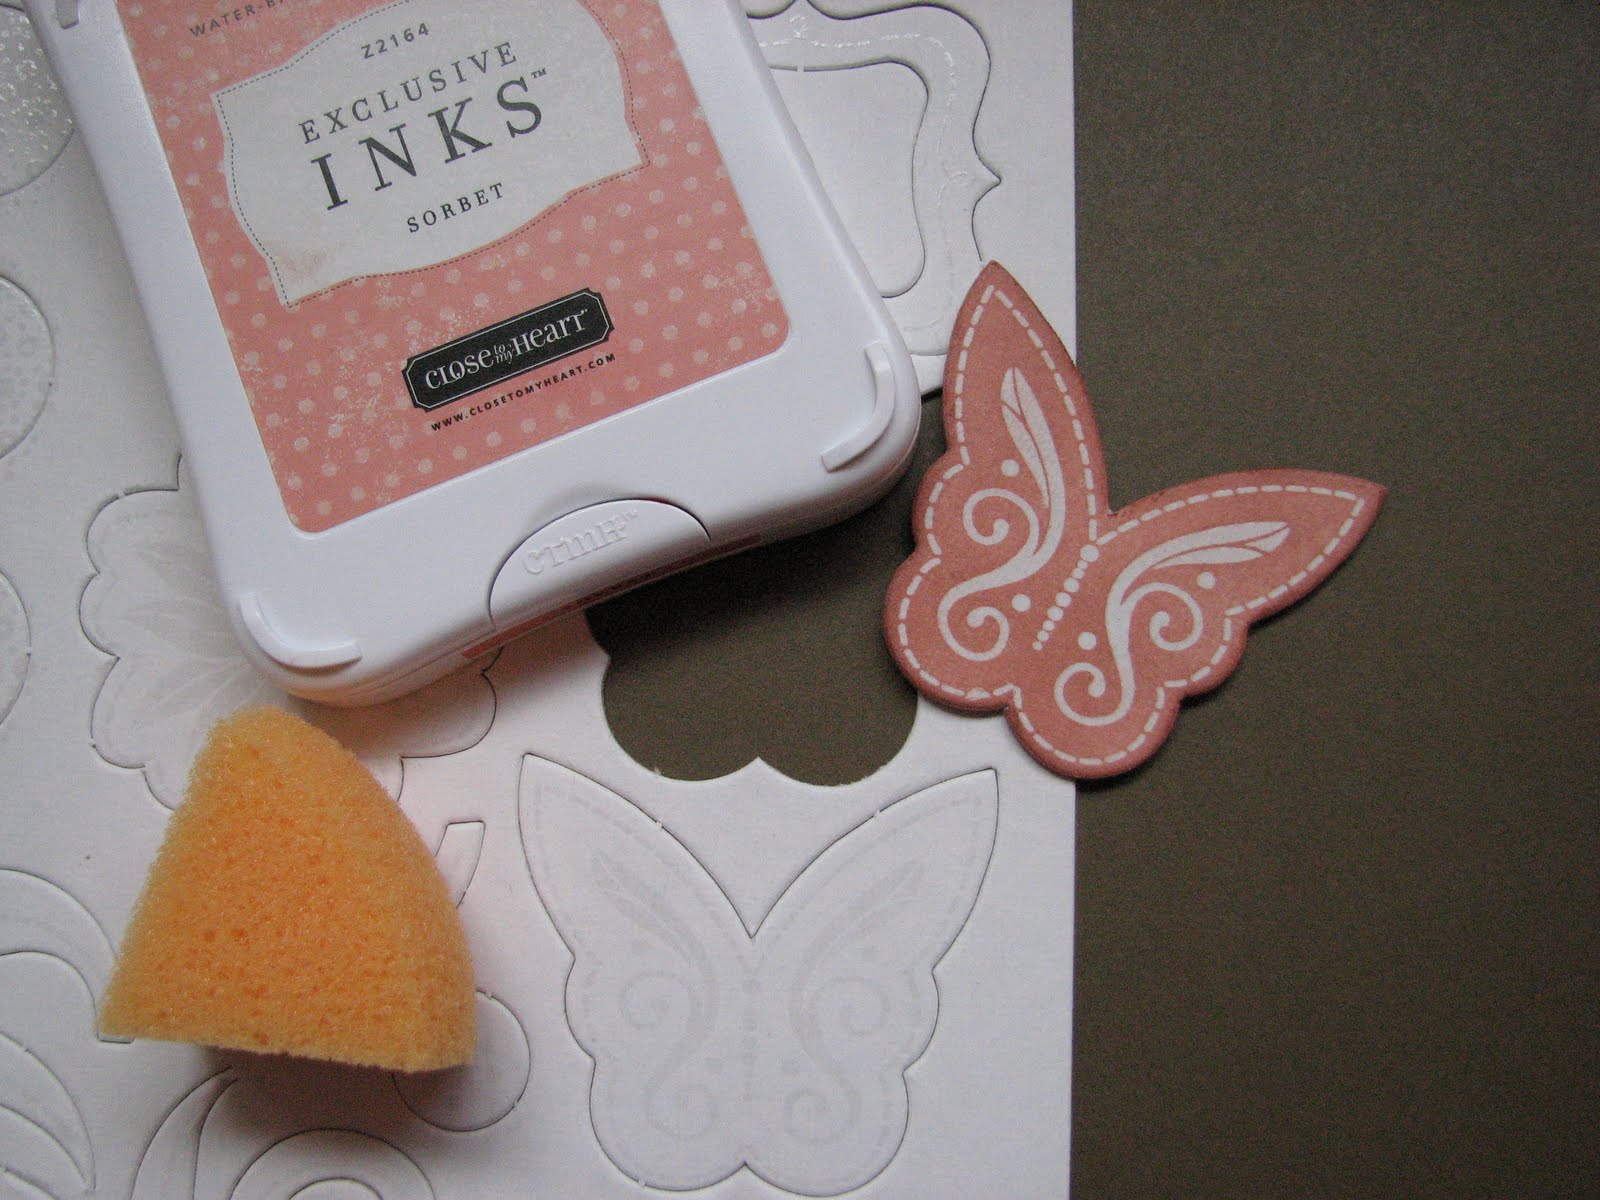
Step 4:
Remove a blue butterfly from the Stickease sheet and bend it in the center so the wings stick up. Tape the center of the butterfly to the dimensional element. 
Step 5:
Cut a piece of ribbon from the Mini-Medley Colonial White pack and tape it to a 1 x 4 3/8 piece of Sorbet textured paper from the Caboodle paper pack. (It is the back side of the same paper that we used for the square.)

Step 6:
Glue the card together as seen in the first photo. You're done! Feel free to post a comment about the card or if you have any questions. Thanks!

No comments:
Post a Comment